’06 on the Lost Hollow Railway

January 1: For a change of pace, I started work today on kitbashing my Regner Konrad. Photo set available here: “Regner Konrad Kitbash“.

January 2: Robin and I worked on the garden today, replanting a lot of the plants we had to remove to clean up the old garden. New photos in this set: “Rebuilding the Garden“.

January 16: I’ve been traveling a lot over the last couple of weekends so no progress on the Lost Hollow. We had the first big storm to hit our area in a while; it will be interesting to see if any earth moves around.

January 17: Received in the mail today, two Hartford Product log disconnect kits. Finally, we will have some rolling stock for the Lost Hollow. Also came across this most excellent article on MyLargeScale.com on figure building: I’m going to have try to build a few at some point.

February 2: Regner has a new locomotive out, one that looks a lot more North American: the Lumber Jack. Very cool. Haven’t been around much, so the layout has not progressed much.

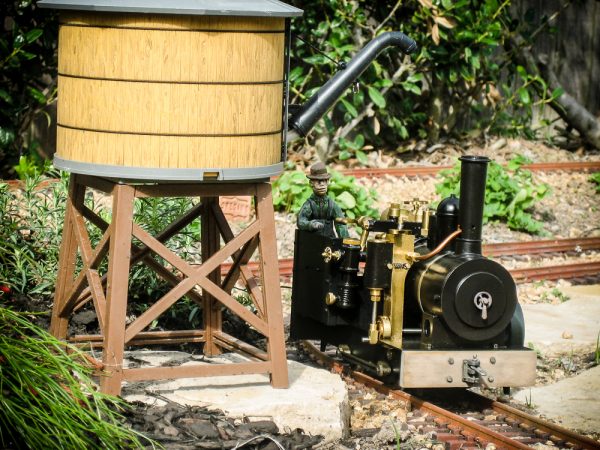
February 4: Spent a couple of hours ballasting the track this afternoon. The improvement of the look of the railway is tremendous: no more white hardi-plank showing through everywhere. Need to buy some more flagstone before the ballasting is finished though.

February 5: Took the opportunity to run Engine No. 1 around the layout this morning to check on the quality of my ballasting. Had to adjust things in a few places but all in all everything was good. Finished the ballasting on all but the front section in the afternoon.

February 9: Despite having the two Hartford Product kits to work on this week, I spent the last couple of evenings building a scale figure. I’m pretty pleased with my first attempt.

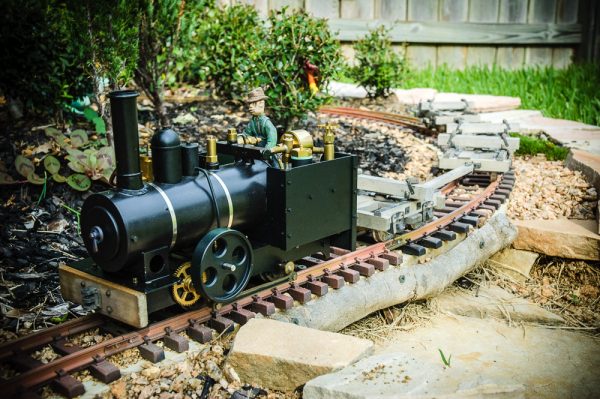
February 10: I bit the bullet and disassembled Konrad today for repainting. I’m using Krylon semi-flat black to cover the orange and dark green on the outer surfaces. I also drilled and tapped holes for the new hex nuts to hold the rear coupler on. Now I just need to put it all back together properly!

February 11: Konrad is all back together. See the photo set available here: Regner Konrad Kitbash“.

February 21: Came across the Twin Mountain Model Works website yesterday. The small coach would be perfect for the Lost Hollow Railway.

March 11: Spring is coming to Houston so things are starting to grow rapidly in the garden. I’m clearly going to have to spend more time weeding over the next few months. I also ordered a coach kit from Twin Mountain Model Works. This now makes three kits I need to finish.

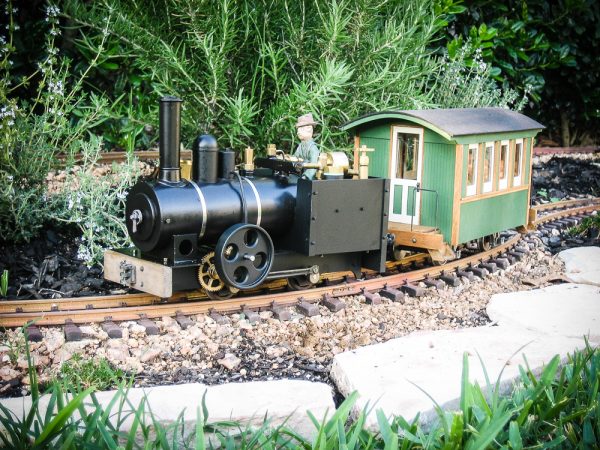
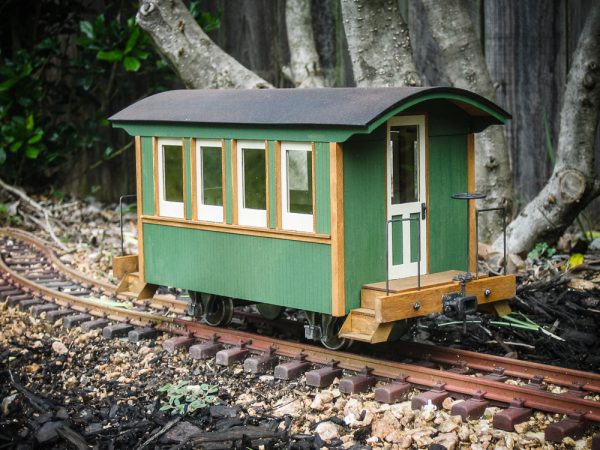
April 9: I got started on the Twin Mountains coach. The colour scheme will be Polly-S coach green with Polly-S beige highlights and Floquil maple stain everywhere else.

April 20: The coach is finished, which means I have finally have something to pull at the next steamup.

April 29: John Frank hosted the Spring 2006 Katy Steamup today. A photo set is available here.

May 20: Robin and I moved some more plants around and I reballasted a good portion of the line. This time I screened the decomposed granite ballast and used only 1/4″-minus material. I also harvested a good load of oregano, thyme and rosemary.

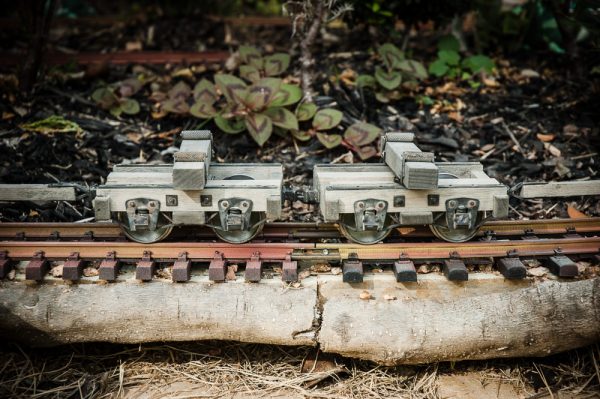
May 21: I started work today on the Hartford Products disconnects or “bobbers” as they are called on some logging outfits. Lots of drilling and distressing of the wood. I’ll use some old Floquil “Natural Pine” stain with a wash of Weather-It. Metal pieces will be darkened with Blacken-It.

May 27: I attended the Memorial Day Weekend Southwest Live Steamers/Houston Area Live Steamers meet at Zube Park in northwest Houston. Photo set available here.

June 10: I finally started back working on the disconnects today, after a few weekends off doing other things.

July 2: We’ve been traveling for a couple of weeks, and when we returned, we discovered the Lost Hollow has become seriously overgrown in several areas. A morning in the garden and things are back in order. I’m also trying to finish up work on the logging disconnects so that I can get back to other projects like some more figures and some buildings.

July 15: I’ve finally completed the logging disconnects to the point where they can be used. I haven’t yet put the brake gear on; it’s pretty fiddly work. Other than that, I’m pretty happy with the way they turned out.

August 20: Once again it’s been a while since I worked on the Lost Hollow; it’s just been too hot here over the last couple of months. However, after our weekly cutting of the lawn, Robin helped me weed the town end of the layout. The forest end has fared much better in terms of weeds. Hopefully, we’ll get a chance to run everything in September. I’m also looking at some more buildings.

Logging Disconnects for the LHR

Given the Lost Hollow Railway’s logging theme, some log hauling rolling stock would make a good start. Rather than building a simple set of flatcars, I thought I might go for more of a big logging look by getting some disconnects. A single disconnect simply supports the cut tree at one end and relies on the tree to be its own support. Finescale Railroader‘s March 2006 Issue has some excellent pictures of Michigan-California Lumber Company’s disconnects. I especially like the hand-painted car numbers and I will try to do something similar on the Lost Hollow Railway cars.

After doing some Internet searching, I purchased two Hartford Product 1:20.3 narrow gauge logging disconnect kits. The level of detail in the kits is very high and it took me some time to build the four disconnects up. I did leave some of the more fragile parts off the models (brake details mostly) as I was afraid they would not survive the rough handling these models can sometimes get.

In the end, I ‘m very happy with the way the disconnects turned out. They definitely moved some big logs around the Lost Hollow Railway.

Hauling Big Logs on the LHR

A Coach for the LHR

The first completed piece of rolling stock on the Lost Hollow Railway is a Twin Mountains Model Works plantation coach. It is a very well-thought out kit; nice work on the laser cutting. The colour scheme is as follows:

  • siding: Polly-S coach green
  • trim: Polly-S SCL covered hopper beige
  • wood: Floquil maple stain
  • metal: Blacken-It

It definitely requires a “rooster” to hook it up to “Konrad”. A “rooster” was logging slang for a a piece of metal (3′ to 6′) used instead of a link in a link and pin coupler system.

Figure Building

I was really intrigued when I read Chris Walas’ articles on figure building on MyLargeScale.com. Armed with all this good information, I started sculpting a figure: Engineer Bill.

Scratchbuilt Figure: Engineer "Bill"

He’s based on a photograph from the book “The Fossmill Story” and is designed to stand in the cab of my live steam Konrad engine. I found it much easier to get the proportions right working from a photograph. Here he is after painting:

Engineer Bill Painted

LHR Engine “Konrad”

The first engine for our garden empire is a Regner Konrad. It is a very simple engine that uses a single oscillating steam cylinder to drive the wheels through a gear system. Reviews for the engine have been very positive and I bit the bullet and purchased one. Right out of the box, the Konrad was a bit too colourful for me and I set out to kitbash into a small turn-of-the-century logging locomotive. Here’s a list of things I changed:

  • Installed new wooden bumpers at both the front and rear.
  • Installed link and pins couplers back and front.
  • Repainted the underframe and cab from their red and green colours respectively to black.
  • Added a new more-to-scale engineer figure.

Konrad has been a delight to operate. I get about 15 minutes of running from a boiler full of water and a full fuel tank. Because of the gear system, the engine is quite powerful and moves a pretty consistent speed on level track. It handles the light grades on the LHR well.

I highly recommend anyone interested in live steam to take a good look at these Regner engines as their entry point into the hobby.

’05 on the Lost Hollow Railway

October 19: Placed my order for a Regner Konrad live steam engine with the Train Department.

October 26: UPS delivered the engine today and I’ve been pouring over the documentation. Finding butane cans with the right adapter looks to be the biggest hurdle.

October 29: Went to Papa Ben’s and got a bunch of supplies including some Aristocraft track (5 ft diameter circle plus 12 feet of straight track). This should be enough to get something started in the back yard.

October 30: The first run for my Konrad engine. Ran it around the circle of track on the patio for 10 minutes.

November 12: I attended a steamup at John Frank’s house with the Houston live steamers. Had a great time and ran LHR Engine no. 1 for several loops around John’s beautifully landscaped garden railway. Here are some photographs: Katy Fall Steamup. It’s clear to me now that I need to get some rolling stock.

November 19: Steamed up at Zube Park, home of the Houston Area Live Steamers. It was their last public run day of the year and we had a lot of interested kids and parents stop by to watch the fun on the #1 gauge track. Engine no. 1 got about six runs in around the big loop. Photos here: Thanksgiving Steamup at Zube Park.

November 20: Robin and I surveyed the east part of the garden in our backyard for the new layout. We plan on putting a small layout within the footprint of the existing bed. It will require us move or remove several existing plants but nothing too important. I plan on using Aristo-Craft sectional track for simplicity and because I know there is a good supply near by at Papa Ben’s. Roadbed will be based on a “harditrim” system used by others in the Houston area.

November 24: On a lovely Thanksgiving Day, Robin and I started working in the back garden to clear a space for the garden railway. I’ve put together a Flickr set “Clearing the Old Garden” to document our progress.

November 25: We continued to clean up the garden, this time at the west end. We lifted up the flagstone patio we put in a couple of years ago; it really didn’t turn out as well as we expected.

November 26: A heavy rain is falling in Lost Hollow today, holding up construction. I did join a large number of track sections together in preparation of laying track soon.

November 27: I ordered the remaining track I needed today off the Internet. Robin and I also visited John Frank to talk about building his techniques of building harditrim roadbed.

November 30: I spray-painted all of the track I had on hand using various flat camouflage colours from Krylon. Still waiting for the remainder of the track to arrive.

December 3: Picked up 5 pieces each of 1″x4″x12′ and 1″x6″x12′ harditrim from the local Home Depot. Proceeded to cut out the roadbed for all of the curved sections of the layout. I’ve put together a Flickr set Track and Roadbed to document this part of the project.

December 10: The remaining track has shipped so it looks like I’ll be doing some work on the garden railway over the holidays.

December 11: We cleaned up the remaining section of the garden today, so we’re all ready for track. New photos here: “Clearing the Old Garden

December 17: The track finally arrived so I spray-painted it all first thing today. Then I started laying roadbed and track in the garden. Thank goodness for the 3rd Plan-it diagram of the layout as everything fit where it was supposed to. New photos in the “Track and Roadbed” photo set.

December 18: Up early today and back out working in the garden. I completed the west loop and the steamup area. Even took the opportunity to run my engine around the partially completed loop. New photos in the “Track and Roadbed” photo set.

December 23: Finished laying track today. A big job completed and now we can run trains whenever we want. New photos in the “Track and Roadbed” photo set.

December 27: Attended a steamup at Steve Speck’s place today. Steve was the perfect host and we had a great day of weather and steaming. Engine No. 1 pulled a 22-car train around Steve’s layout; I was pretty impressed.

December 29: Back in the garden today, rebuilding the retaining wall around the front edge of the layout. I’ve put together a Flickr set “Rebuilding the Garden” to document this part of the project.

Layout Design for the LHR

We have only a small area in the back yard for a garden railroad: basically about 8′ by 32′. Robin and I did a detailed survey of the space so we would have an accurate idea where things were: sprinkler heads, fences, trees and other unmovable objects.

I then used 3rd PlanIt to design the layout. It was very easy to recreate the Aristocraft sectional track in 3rd PlanIt and duplicate as many times as needed. I played around with a lot of different ideas before settling on the following. It’s very simple but scenic at the east (“top”) end. The ruling diameter with the curves is 5 feet (2.5 foot radius) so the layout is for small engines and rolling stock only.

The other big feature was building elevation changes into the design. This appears to be a no-no for live steam engines, but my preliminary tests indicate that the 1.2% grade I planned should cause no major problems. And the layout definitely looks better with the vertical separation between the front and back.

Lost Hollow Railway

While building the layout, I decided to add a bridge at each end to drain the loops. They add visual interest as well.

Operations Guide for the PM&TCo

Pakesley Mill and Timber Company LogoI’m keenly interested in recreating prototypical operations on my Pakesley Mill & Timber Company. As such, I have been developing a comprehensive primer introducing operations appropriate for a 1920’s era short line railroad like the Key Valley Railway, on which I have based the PM&TCo. There has been much written recently about realistic operations. However, very little of this information has been compiled into a single document for model railroads of this era. From my research, the following operational characteristics would apply to the prototype Key
Valley:

  • All freight trains would be run as extras.
  • Some level of passenger service would be appropriate (one or two return runs per day), with train times typically coordinated with the arrival of a CPR passenger train at Pakesley and with the steamship at Lost Channel.
  • Only a small number of trains would be active at any one moment (typically the maximum would be two to three).
  • Communications with the dispatcher would be via a telephone system strung alongside the mainline.
  • Dispatching would be done via verbal/written train orders using manual block stations.
  • Train crews would line their own turnouts.
  • Train crews would makeup their own consists.

These same characteristics would apply to many narrow gauge and short line railroads from the late 1800’s to the 1940’s. My goal is to use these characteristics as guideline to develop an operations scheme for the PM&TCo that is close to the prototype in feel but still enjoyable to operate. I must stress that the choices I have made are not the only way of doing things, and others may prefer a different car forwarding or dispatching scheme. However, I am trying to strike a number of balances, the most important being the alance in work across the various operating positions.

The operating schemes I’ve developed place specific requirements on layout design. They are:

  • The layout design should permit an operator to follow his or her train around the layout in a straightforward manner. This encourages a linear design methodology.
  • The use of walkaround throttles is almost mandatory.
  • The use of Digital Command Control (DCC) is encouraged to eliminate the need for throwing unprototypical block switches.
  • Turnout controls are located on the layout fascia right in front of the desired turnout.
  • A telephone system to communicate between the dispatcher and the train crew is preferred.

None of these assumptions are very restrictive to today’s layout designers and most members of the Layout Design Special Interest Group (LDSIG) would say they are all necessary on a state-of-the-art layout design.

My basic plan is to have two-person train crews plus a combined dispatcher/freight agent role. The dispatcher will be responsible for determining what trains will be run and what switching activities each train will perform. This will hopefully keep the dispatcher busy, since the number of meets and passes on such a small railroad will be few.

I’ve broken the primer down into several sections for readability; however, most sections are highly interrelated and it would do the interested reader well to look at all sections at least once.

  • Roles (the operating roles on the PM&TCo)
  • Systems (the physical systems that are in place to support operations)
  • Operation Cycle (the steps in performing one shift of operations)
  • The Dispatcher (the activities of the dispatcher)
  • The Train Crew (the activities of the train crew)

Download the Primer for Narrow Gauge and Shortline Operations. Please be aware that several sections remain incomplete.

The PMT&Co in MRP 2003

Front Cover of Model Railroading Planning 2003I received my author’s copy of Model Railroad Planning 2003 today. I’m really pleased at the way the article turned out. Thanks to Tony Koester and Andy Sperandeo, the editors of Model Railroad Planning, for the opportunity to publish the PM&TCo story.

The most challenging aspect of preparing the article was the photography: working under fluorescent lights required the use of  filters to remove the color shifts caused by the lights.